
This is chapter 0, which is presented as a means of establishing a proper build system, of a multi-part series on writing a RISC-V OS in Rust.
Table of Contents → (Chapter 0) → Chapter 1
I Need Your Support
Writing these posts is a past-time right now as my full time job is educating (mostly) undergraduate college students. I will always deliver content, but I could really use your help. If you're willing, please support me at Patreon (pavehawk2007)
I've just started and there is much to do! So, please join me!
Setup and prerequisites
Updated 2020
The RISC-V toolchain is well supported now and can support building. Please use the following:
git clone --recursive https://github.com/riscv/riscv-gnu-toolchain.git
cd riscv-gnu-toolchain
git submodule update --init --recursive
./configure --prefix=/opt/riscv64_1
sudo make linux
This will install the 64-bit toolchain into /opt/riscv64_1. You will still need to add /opt/riscv64_1/bin into your path so you can execute riscv64-unknown-linux-gnu-g++ and other tools.
If you built the toolchain above, skip to the Rust portion of this post.
Overview
I don't develop on a native RISC-V system, so instead, I cross-compile from Intel x86_64 to RISC-V. To do so, I use the following git repositories:
- Binutils and GDB:
git://sourceware.org/git/binutils-gdb.git - GCC compiler:
https://github.com/gcc-mirror/gcc.git - GLIBC:
git://sourceware.org/git/glibc.git - Linux (for headers):
https://git.kernel.org/pub/scm/linux/kernel/git/torvalds/linux.git - QEMU (for emulating):
git://git.qemu-project.org/qemu.git
Since these are git repositories, you might not want to use the `master` branches, as they're probably still in development and unstable. Instead, I suggest using the following branches or tags for RISC-V:
- Binutils: tag: binutils-2_32 (
git checkout binutils-2_32) - GCC: tag: gcc-9_2_0-release (
git checkout gcc-9_2_0-release) - GLIBC: tag: glibc-2.29 (
git checkout glibc-2.29) - Linux: tag: v5.3 (
git checkout v5.3) - QEMU: tag: v4.1.0 (
git checkout v4.1.0)
Build Automation Script
If you dare, I wrote a script to help automate this, since I build cross compilers for several platforms. The code is below, or you can download it: do.sh.
It also takes a configuration file for directories and versioning information. An example for my system can be downloaded: .build.config.
For the automated version, put do.sh and .build.config into a "downloads" folder. Then in the same folder clone the repositories posted above. Your directory structure should
look like the following:

Configuration File
A preview of the build configuration is shown below. In here, I set up a bunch of environment variables that the do.sh script will use to
build and install in the proper locations. I use Arch Linux, so I use sudo to install. If you don't, simply set USE_SUDO="".
This will install into PREFIX, which I have set to /opt/riscv64_1 if you set ARCH, BITS, and TAG. I use the TAG because I
have experimental compiling tools that I don't want to overwrite. If you don't care, feel free to leave TAG blank.
USE_SUDO="sudo"
JOBS="10"
LINUX_VER="git"
BUILD_ROOT="${PWD}"
BUILD_BINUTILS="${BUILD_ROOT}/build-binutils"
BUILD_GCC_S1="${BUILD_ROOT}/build-gcc-s1"
BUILD_GCC_S2="${BUILD_ROOT}/build-gcc-s2"
BUILD_GLIBC_S1="${BUILD_ROOT}/build-glibc-s1"
BUILD_GLIBC_S2="${BUILD_ROOT}/build-glibc-s2"
BUILD_QEMU="${BUILD_ROOT}/build-qemu"
ARCH="riscv"
BITS="64"
TAG="_1"
ABI="lp64"
ISA="rv64g"
TARGET="${ARCH}${BITS}-unknown-linux-gnu"
LIB_HEADER="linux.h"
BUILD_LINUX_ARCH=$ARCH
BUILD_LINUX="${BUILD_ROOT}/linux-${LINUX_VER}"
BUILD_LINUX_HEADERS="${BUILD_ROOT}/build-${TARGET}-linux-headers"
PREFIX="/opt/${ARCH}${BITS}${TAG}"
SYSROOT="${PREFIX}/sysroot"
PATH="${PREFIX}/bin:${PATH}"
Building
To start building using the script, type sh do.sh 0. The parameter 0 means to start building from the start and don't stop until it's done
or if there was an error. This script leaves your git repo directories pristine and creates build-binutils, build-gcc-s1 (stage 1), etc. Building a single
stage is an option if you add the number 9 in front of it. For example, sh do.sh 96 will rebuild QEMU only and stop there. Other options are as follows:
Must provide a number
0 - Binutils
1 - GCC Stage 1
2 - Linux Headers
3 - GLIBC Headers
4 - GLIBC
5 - GCC Stage 2
6 - QEMU
7 - Libs and Links
Add 90 if you just want to build that one stage
99 - Clean
Toolset
When finished, you will probably need to add whatever you set for PREFIX in your path. Then you should see something that resembles the following:

Setting Up Rust
Rust has a nice manager called Rustup which is a script and can be downloaded at: https://rustup.rs/. First, run this installer to install the actual rustup tool. Then, when you have this, you will need to install the packages necessary for RISC-V. The following should do:
rustup default nightly-2019-09-25
You should see the following:
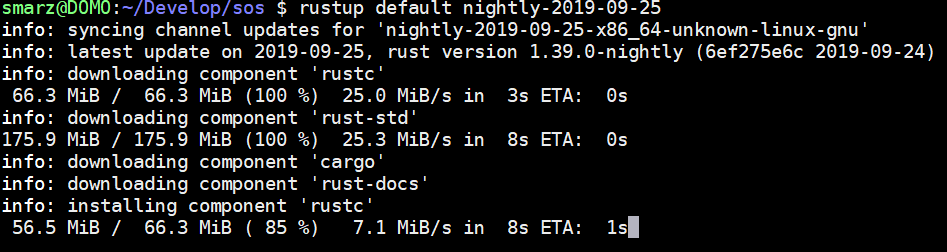
I chose 2019-09-25 because all of the components are available for it. You can check the status of the components at https://rust-lang.github.io/rustup-components-history.
After this is done, we need to install the components necessary for RISC-V:
rustup target add riscv64gc-unknown-none-elf
If you're using a smart code editor, such as VSCode, you can install the Rust Language Server (rls) and clippy to give you helpful, but sometimes annoying hints and tips on how you should write rust code.
rustup component add rls rustfmt rust-analysis clippy
Setting Up the Build
Now that we have the tools, lets automate as much as possible since we'll be compiling a lot, fixing Rust's nice error messages, and compiling again.
Create any old directory by typing cargo new myos --lib. I called mine sos for Steve's Operating System--my vanity gets the best
of me sometimes.
You will see that myos has been given a directory in the current directory. Go into that directory and edit Cargo.toml. This is
where cargo will find some of the parameters we will give it to determine how to build your code.
[package]
name = "sos"
version = "0.1.0"
authors = ["Stephen Marz "]
edition = "2018"

# See more keys and their definitions at https://doc.rust-lang.org/cargo/reference/manifest.html

[lib]
crate-type = ["staticlib"]

[dependencies]
Change the name, version, and authors. Then, add a section
[lib] with the key crate-type = ["staticlib"]. This will compile
our kernel into a static library (archive file) that we can link to create our operating system!
Now we need to add a configuration so that cargo knows our target is RISC-V. Inside your myos directory, create a new one called .cargo.
Inside .cargo, edit a new file called config, and add the following:
[build]
target = "riscv64gc-unknown-none-elf"

[target.riscv64gc-unknown-none-elf]
linker = "riscv64-unknown-linux-gnu-gcc"
Automating with make
Now we can create a Makefile to automatically build our stuff. This isn't going to be the end-all-be-all Makefile. Instead, it is a get the job done
Makefile.
Create a directory called src to hold your Rust files and src/asm to hold your assembly files. Finally, create a directory
src/lds to contain your linker scripts for setting memory regions when we build.
The Makefile will be ran in your project directory myos, but it'll search for the files in src/asm and src/lds. Cargo, Rust's build tool
will expect the Rust source files to be in src/.
In the myos directory, create a Makefile and add the following:
#####
## BUILD
#####
CC=riscv64-unknown-linux-gnu-g++
CFLAGS=-Wall -Wextra -pedantic -Wextra -O0 -g -std=c++17
CFLAGS+=-static -ffreestanding -nostdlib -fno-rtti -fno-exceptions
CFLAGS+=-march=rv64gc -mabi=lp64
INCLUDES=
LINKER_SCRIPT=-Tsrc/lds/virt.lds
TYPE=debug
RUST_TARGET=./target/riscv64gc-unknown-none-elf/$(TYPE)
LIBS=-L$(RUST_TARGET)
SOURCES_ASM=$(wildcard src/asm/*.S)
LIB=-lsos -lgcc
OUT=os.elf

#####
## QEMU
#####
QEMU=qemu-system-riscv64
MACH=virt
CPU=rv64
CPUS=4
MEM=128M
DRIVE=hdd.dsk

all:
	cargo build
	$(CC) $(CFLAGS) $(LINKER_SCRIPT) $(INCLUDES) -o $(OUT) $(SOURCES_ASM) $(LIBS) $(LIB)

run: all
	$(QEMU) -machine $(MACH) -cpu $(CPU) -smp $(CPUS) -m $(MEM)  -nographic -serial mon:stdio -bios none -kernel $(OUT) -drive if=none,format=raw,file=$(DRIVE),id=foo -device virtio-blk-device,scsi=off,drive=foo


.PHONY: clean
clean:
	cargo clean
	rm -f $(OUT)
Feel free to edit as you see fit. I configured QEMU to give us a machine with 4 CPUS and 128 megabytes of memory. The hdd.dsk is a random 32 megabyte drive which can be created using the following command:
dd if=/dev/zero of=hdd.dsk count=32 bs=1M
You will see that there is a virt.lds file specified. This file needs to go into src/lds/ and looks like the following:
OUTPUT_ARCH( "riscv" )

ENTRY( _start )

MEMORY
{
	ram   (wxa!ri) : ORIGIN = 0x80000000, LENGTH = 128M
}

PHDRS
{
	text PT_LOAD;
	data PT_LOAD;
	bss PT_LOAD;
}

SECTIONS
{
	.text : {
	PROVIDE(_text_start = .);
	*(.text.init) *(.text .text.*)
	PROVIDE(_text_end = .);
	} >ram AT>ram :text
	PROVIDE(_global_pointer = .);
	.rodata : {
	PROVIDE(_rodata_start = .);
	*(.rodata .rodata.*)
	PROVIDE(_rodata_end = .);
	} >ram AT>ram :text

	.data : {
	. = ALIGN(4096);
	PROVIDE(_data_start = .);
	*(.sdata .sdata.*) *(.data .data.*)
	PROVIDE(_data_end = .);
	} >ram AT>ram :data

	.bss :{
	PROVIDE(_bss_start = .);
	*(.sbss .sbss.*) *(.bss .bss.*)
	PROVIDE(_bss_end = .);
	} >ram AT>ram :bss

	PROVIDE(_memory_start = ORIGIN(ram));
	PROVIDE(_stack = _bss_end + 0x80000);
	PROVIDE(_memory_end = ORIGIN(ram) + LENGTH(ram));
	PROVIDE(_heap_start = _stack);
	PROVIDE(_heap_size = _memory_end - _stack);
}
The point of this file is to set up our memory regions and order as we see fit. You'll notice that we set the origin at
0x8000_0000, which is where our system will start executing CPU instructions.
NOTE: I added several comments to the virt.lds script on GitHub to explain what all of those symbols mean in the linker script. I did not add them to this page because it'll clutter the linker script. If you'd like to know how the linker script is put together, please refer to the comments I made to the virt.lds script on GitHub.
More information about linker scripts can be found at https://sourceware.org/binutils/docs/ld/Scripts.html.
Now, when we want to rebuild our kernel, we type make. When we want to test it, we type make run. Since cargo manages our
incremental building, I'm not going to make a convoluted Makefile that does essentially the same thing.
Finished!
That's the boring part, and assuming everything went well (it does on ArchLinux!), now to the fun parts!
(Chapter 0) → Chapter 1