
This is chapter 2 of a multi-part series on writing a RISC-V OS in Rust.
Table of Contents → Chapter 1 → (Chapter 2) → Chapter 3
Communications
Video
A video version with commentary can be found at: https://www.youtube.com/watch?v=1SR1sB8W248.
Overview
What's good about having this operating system that we're writing when there are no results to show? The short answer is nothing. We've birthed this boy and given it a name, so let's talk!
We are going to start building the pieces of the operating system and they will fit together, like a puzzle, at a later time. Some will fit fairly early (console and this UART driver fit closely) and others will fit later. Be patient, and we'll make it through!
Get the Code!
To make following this easier, head on over to https://github.com/sgmarz/osblog and grab the code for chapter 2.
Universal Asynchronous Reciever / Transmitter (UART)
We are going to communicate first using UART (Universal Asynchronous Receiver / Transmitter). The virtual
machine we're using through QEMU emulates the NS16550A UART chipset. We control this UART system using
memory mapped I/O at base address 0x1000_0000. In here, we can control the NS16550a registers,
which are all 8-bits.
Memory Mapped IO (MMIO)
Essentially, what we're going to do is set a pointer to the address 0x1000_0000. When we write to this address or some offset to this address, we're actually talking to the UART device instead of physical ram. This is a system well known in embedded systems called MMIO or Memory-mapped Input and Output.
NS16550a Registers
A register is just a little bit of memory located on a hardware device. For the NS16550a, this memory is accessed one byte at a time. For example, the registers are laid out below (under "Register Chart"), and you can see that the transmitter (THR) and receiver (RBR) registers are both exactly 8-bits (1 byte). When I read from a pointer pointing to 0x1000_0000, I extract those 8-bits from the RBR. When I write to the exact same pointer pointing to 0x1000_0000, I will be transmitting to the THR.
This MMIO system is nice, since it doesn't require us to do anything special aside from reading from or writing to a memory address. Since Rust supports raw pointers, it makes it fairly easy for us to control the hardware. In C++, we could write the following to read and write to the transmitter.
void mmio_write(unsigned long address, int offset, char value)
{
	// We use volatile so that the optimizer on the
	// compiler doesn't think we're writing a value for
	// no reason.
	volatile char *reg = (char *)address;

	// To write, the pointer is on the left hand side of
	// the assignment operator.
	// Transmit the word 'A'
	// (which is the 8-bit value 65 or 0b0100_0001)
	*(reg + offset) = value;
}

char mmio_read(unsigned long address, int offset)
{
	// We use volatile so that the optimizer on the
	// compiler doesn't think we're writing a value for
	// no reason.
	volatile char *reg = (char *)address;

	// To read, the pointer is dereferenced on a read.
	// This reads from the receiver and returns the data.
	return *(reg + offset);
}
MMIO with Rust
Rust does have raw pointers, but it doesn't have the volatile keyword. Instead,
we use the pointers as objects and use the write_volatile and
read_volatile members of Rust's raw pointers. For example,
/// # Safety
///
/// We label the mmio function unsafe since
/// we will be working with raw memory. Rust cannot
/// make any guarantees when we do this.
fn unsafe mmio_write(address: usize, offset: usize, value: u8) {
	// Set the pointer based off of the address
	let reg = address as *mut u8;

	// write_volatile is a member of the *mut raw
	// and we can use the .add() to give us another pointer
	// at an offset based on the original pointer's memory
	// address. NOTE: The add uses pointer arithmetic so it is
	// new_pointer = old_pointer + sizeof(pointer_type) * offset
	reg.add(offset).write_volatile(value);
}

/// # Safety
///
/// We label the mmio function unsafe since
/// we will be working with raw memory. Rust cannot
/// make any guarantees when we do this.
fn unsafe mmio_read(address: usize, offset: usize, value: u8) -> u8 {
	// Set the pointer based off of the address
	let reg = address as *mut u8;

	// read_volatile() is much like write_volatile() except it
	// will grab 8-bits from the pointer and give that value to us.
	// We don't add a semi-colon at the end here so that the value
	// is "returned".
	reg.add(offset).read_volatile()
}
If you're curious about add, Rust provides this as a wrapper for the normal ptr.offset, but offset
takes an isize meaning that it can be positive or negative. For clarity, I use .add() from
the base register, but you can choose whichever you wish.
I put in the comment for mmio_read about not adding a semi-colon. Rust is primarily an "expression language" as documented here:
https://doc.rust-lang.org/reference/statements-and-expressions.html. Essentially,
Rust will boil the function down into the return component, which for this function is a single u8 (unsigned 8-bit integer). When we add a semi-colon, we're telling
Rust to discard the result of evaluation and return the () type, which Rust calls the unit type (see https://doc.rust-lang.org/stable/rust-by-example/expression.html).
Register Chart
The NS16550a registers are as follows:

Before we transmit and receive, we have to set up the UART controller as follows:
- Set word length to 8-bits (LCR[1:0])
- Enable FIFOs (FCR[0])
- Enable receiver interrupts (IER[0])
Set the word length to 8 bits
The word length describes how many bits the transmitter and receiver buffers may contain at once. The reason this is settable is because even though we can support up to 8-bits at once, the UART on the other side might not be able to. However, QEMU allows for all 8-bits, so that's what we're going to do. There are two bits in the line control register (LCR) that control the word length. According to the technical specifications, if we write a 1 in each of these slots, we get an 8-bit character length. By default, if we write a 0 into each slot, we get a 5-bit word length, which is just weird.
Enable FIFOs
A FIFO is usually implemented as a hardware shift-register which allows multiple bytes to be stored at one time. The acronym FIFO is First-In, First-Out. When data is added to the FIFO, it retains the same order so that when I read from the same FIFO, I get the first piece of data entered. This is nice because when somebody types "hello", we read it one byte at a time as h, e, l, l, o.
Enable Receiver Interrupts
Enabling the receiver intterupt means that whenever data is added to the receiver, the CPU is notified through an interrupt. For purposes of this chapter, we will not actually handle the interrupt because it requires us to program the platform-level interrupt controller (PLIC), which we will do later. Instead, for purposes of this chapter, we will "poll" the UART to see when data arrives.
Setting the Signaling Rate (BAUD)
Since this isn't a real UART (only emulated), we actually don't need to set the divisor to divide the clock to get a particular baud rate. However, the procedure to do so is to set the DLAB (divisor latch access bit) to 1. Then base address + 0 and base address + 1 are now the lower 8-bits and upper 8-bits of the divisor, respectively. Then, you close the latch by clearing the DLAB bit to 0.
/// Initialize the UART driver by setting
/// the word length, FIFOs, and interrupts
pub fn uart_init(base_addr: usize) {
	let ptr = base_addr as *mut u8;
	unsafe {
		// First, set the word length, which
		// are bits 0, and 1 of the line control register (LCR)
		// which is at base_address + 3
		// We can easily write the value 3 here or 0b11, but I'm
		// extending it so that it is clear we're setting two individual
		// fields
		//         Word 0     Word 1
		//         ~~~~~~     ~~~~~~
		let lcr = (1 << 0) | (1 << 1);
		ptr.add(3).write_volatile(lcr);

		// Now, enable the FIFO, which is bit index 0 of the FIFO
		// control register (FCR at offset 2).
		// Again, we can just write 1 here, but when we use left shift,
		// it's easier to see that we're trying to write bit index #0.
		ptr.add(2).write_volatile(1 << 0);

		// Enable receiver buffer interrupts, which is at bit index
		// 0 of the interrupt enable register (IER at offset 1).
		ptr.add(1).write_volatile(1 << 0);

		// If we cared about the divisor, the code below would set the divisor
		// from a global clock rate of 22.729 MHz (22,729,000 cycles per second)
		// to a signaling rate of 2400 (BAUD). We usually have much faster signalling
		// rates nowadays, but this demonstrates what the divisor actually does.
		// The formula given in the NS16500A specification for calculating the divisor
		// is:
		// divisor = ceil( (clock_hz) / (baud_sps x 16) )
		// So, we substitute our values and get:
		// divisor = ceil( 22_729_000 / (2400 x 16) )
		// divisor = ceil( 22_729_000 / 38_400 )
		// divisor = ceil( 591.901 ) = 592

		// The divisor register is two bytes (16 bits), so we need to split the value
		// 592 into two bytes. Typically, we would calculate this based on measuring
		// the clock rate, but again, for our purposes [qemu], this doesn't really do
		// anything.
		let divisor: u16 = 592;
		let divisor_least: u8 = divisor & 0xff;
		let divisor_most:  u8 = divisor >> 8;

		// Notice that the divisor register DLL (divisor latch least) and DLM (divisor
		// latch most) have the same base address as the receiver/transmitter and the
		// interrupt enable register. To change what the base address points to, we
		// open the "divisor latch" by writing 1 into the Divisor Latch Access Bit
		// (DLAB), which is bit index 7 of the Line Control Register (LCR) which
		// is at base_address + 3.
		ptr.add(3).write_volatile(lcr | 1 << 7);

		// Now, base addresses 0 and 1 point to DLL and DLM, respectively.
		// Put the lower 8 bits of the divisor into DLL
		ptr.add(0).write_volatile(divisor_least);
		ptr.add(1).write_volatile(divisor_most);

		// Now that we've written the divisor, we never have to touch this again. In
		// hardware, this will divide the global clock (22.729 MHz) into one suitable
		// for 2,400 signals per second. So, to once again get access to the
		// RBR/THR/IER registers, we need to close the DLAB bit by clearing it to 0.
		ptr.add(3).write_volatile(lcr);
	}
}
First, you'll probably notice that the function itself is no longer unsafe. Instead, individual
pieces of the function body are unsafe. When we write an unsafe block, we're telling Rust to "hold my beer". If
the function is labeled unsafe, such as unsafe fn uart_init, then all of the code in the function's body
can be safe or unsafe. When we label individual unsafe blocks, we can steer into unsafe Rust only when we can't avoid it.
Reading from UART
Now that we've initialized, we can now read from the UART whenever a character is present. In the future, this read will be triggered by an interrupt, where we can read the value and store it into a buffer in RAM.
fn uart_get(base_addr: usize) -> Option {
		let ptr = base_addr as *mut u8;
		unsafe {
			// Bit index #5 is the Line Control Register.
			if ptr.add(5).read_volatile() & 1 == 0 {
				// The DR bit is 0, meaning no data
				None
			}
			else {
				// The DR bit is 1, meaning data!
				Some(ptr.add(0).read_volatile())
			}
		}
	}
Writing to UART
Analogously, we want to be able to write to the console just the same. So, let's write uart_write.
fn uart_put(base_addr: usize, c: u8) {
	let ptr = base_addr as *mut u8;
	unsafe {
		// If we get here, the transmitter is empty, so transmit
		// our stuff!
		ptr.add(0).write_volatile(c);
	}
}
Rust'ifying It
Now that we have the uart functions written, lets create a uart module. So, start by creating a file called
src/uart.rs. Then move the uart_init, uart_get, and uart_put functions inside. We will be using
something known as a Rust "trait" so that we can link our UART with anything that wants to write...mainly the >write! macro.
Unlike C++, Rust's only structural apparatus is a struct. Rust's struct can have methods and member variables, like C++. So, we're going to wrap the Uart driver into a structure named Uart.
pub struct Uart {
	base_address: usize,
}
We're storing the base address of the UART. There are some platforms out there with multiple UARTs! However, now we're going to link it
to the core::fmt::Write trait. This allows us to use the already-built-in macro write! in Rust. To implement a trait, we need
to use the impl Write for Uart syntax and also make sure that we use core::fmt::Write so that we import the trait
into our uart.rs file. The trait just gives an assurance that a certain (or certain) functions will exist. For example, write_str
below is required by the trait Write. These act very much like Java's interfaces or C++'s abstract classes.
// Rust allows us to import multiple traits or structures or other namespaces in one line by
// using the braces { } as I've done here:
use core::fmt::{Error, Write};

// This is the memory load of the structure. Unlike C++, we don't define the member functions
// here. Instead, we'll use an impl block (implements or implementation).
pub struct Uart {
	base_address: usize,
}
// Here's the implementation block. Notice that impl Uart simply implements member functions
// in our already defined structure.
impl Uart {
	pub fn new(base_address: usize) -> Self {
		Uart {
			// Since our parameter is also named the same as the member
			// variable, we can just label it by name.
			base_address
		}
	}
}
// This is a slightly different syntax. Write is this "trait", meaning it is much like
// an interface where we're just guaranteeing a certain function signature. In the Write
// trait, one is absolutely required to be implemented, which is write_str. There are other
// functions, but they all rely on write_str(), so their default implementation is OK for now.
impl Write for Uart {
	// The trait Write expects us to write the function write_str
	// which looks like:
	fn write_str(&mut self, s: &str) -> Result<(), Error> {
		for c in s.bytes() {
			self.put(c);
		}
		// Return that we succeeded.
		Ok(())
	}
}
Let's Write println!
Ok, so println!() typically interfaces with stdout, but since we're writing the operating system, we don't have one of these fancy
features. So, we'll write our own. We will be writing in Rust's metaprogramming language which is started with the code macro_rules. This
style of programming was my first hurdle, and it was difficult to find a good way to teach undergraduate students the intricacies of this metaprogramming,
which is much like a language unto itself.
To make sure we have a global macro, I write my println in the lib.rs, which I'm calling the "master" file. That is, all of the modules that we write for our os stuff, such as UART, scheduling, processes, will be submodules attached via the lib.rs file. The global macro goes to the top of lib.rs and is started with the following code:
// ///////////////////////////////////
// / RUST MACROS
// ///////////////////////////////////
#[macro_export]
macro_rules! print
{
	($($args:tt)+) => ({
			use core::fmt::Write;
			let _ = write!(crate::uart::UartDriver::new(0x1000_0000), $($args)+);
	});
}
#[macro_export]
macro_rules! println
{
	() => ({
		print!("\r\n")
	});
	($fmt:expr) => ({
		print!(concat!($fmt, "\r\n"))
	});
	($fmt:expr, $($args:tt)+) => ({
		print!(concat!($fmt, "\r\n"), $($args)+)
	});
}
In this code, I'm specifying both print and println, who will be graduated to having their own exclaimation point when we use them. All println! does is adds a newline to the end of whatever we're printing.
So, let's take a look at this syntax. We specify #[macro_export] to export our macro across the rest of our submodules. This is sort of the ying to the
yang of the #[macro_use] directive, which tells Rust that we'll be using the macros of a crate (library).
Now, we go into the "arms", which are the equals-greater-than sign, also known as the "fat arrow" in languages, such as C#. But battling the belt size myself, I'll stick
with the "arm" version. In here, we're specifying a match pattern. Whenever we write something like println!("Hello"), Rust will try to match what we specified
as the parameter. So, I specify a meta-variable using a dollar sign '$'. In here, we tell Rust that we're going to mark our argument as a "token tree" (tt) argument, which is
where $args:tt comes from. The plus sign '+' tells rust that there will be one or more matches here, so to compile, at least one of these token tree arguments must
be specified. Otherwise, it is an error.
Then we come to the arm '=>'. In here, we're telling Rust what to "program" on our behalf should we match that arm. In there, notice I added another scope by simply adding braces {}.
Since our UART driver is implementing the Write trait, we have to tell Rust to "use" that trait when we call "write!". Luckily, the functionality of write! has
been written for us! (Thanks Rust Developers)!
Rust is trying to be a good steward and tell us that write! returns something. We use let _ to tell Rust that we know this, but that we don't care. The underscore '_'
essentially acknowledges the return, but discards it anyway. Inside of write!, I specified the long-hand path to get to our uart driver crate::uart::UartDriver. Essentially,
crate specifies the root, from there we added a module called uart (see the code below), and in that module, we have a structure called UartDriver, which implements a static function
called new.
Finally, we're telling Rust to expand out each argument to the end of the write! macro so that all of the arguments (remember: one or more) are directly passed to the write
macro.
With println, I used expr, which means "expression" to show that one is just a stricter version of the other. This blog isn't intended to be a compiler tutorial, so I'm going to leave that as "future" work--welcome to academia! Instead, I'm just going to show you that Rust will diligently match what we give println and print.
Why Does println have 3 Arms?
Unlike print, we want to be able to call println!(); and just have a newline character printed. This would be stupid if we did it for print! because it wouldn't
do anything. That is why with print, we specify the plus '+', so that we match ONE or more. To match ZERO or more, we would use the asterisk '*'.
The second arm has $fmt:expr, which Rust will match if we provide at least one argument. In this case, this is the format string--something like "Hello {}". Notice
that Rust uses more of the C# style (or does C# use the Rust style--argue amongst yourselves!) instead of the C-style %d, %s, etc. A whole discussion on the formatters can be found
here: https://doc.rust-lang.org/std/fmt/index.html.
The third arm combines the format string and the arguments that need to be substituted into the format string.
Why Create a New UartDriver Each Time?
This post has already gotten quite long, but we'll be using the "singleton" pattern so that only one UartDriver exists out there. However, since the memory location is always the same,
the way I've done it here was to simply wrap that memory address into a UartDriver structure. TL;DR: We'll get there!
Loading UART into lib.rs
I use my lib.rs as my "keeper". It contains some code, but its job is to import the other modules and give us a path to get to them, much like the crate::uart::UartDriver we
wrote in the print macro. So, Rust doesn't use include preprocessor directives, such as C++'s #include. Instead, we import modules by specifying mod uart. I added
pub in front of mine to make them public modules. This is much like how Rust makes all variables immutable by default. The same goes with visibility, and there is a pub keyword that
will make an otherwise private module public.
So, now our code looks something like this:
#![no_std]
#![feature(panic_info_message,asm)]
// ///////////////////////////////////
// / RUST MACROS
// ///////////////////////////////////
#[macro_export]
macro_rules! print
{
($($args:tt)+) => ({
use core::fmt::Write;
let _ = write!(crate::uart::UartDriver::new(0x1000_0000), $($args)+);
});
}
#[macro_export]
macro_rules! println
{
() => ({
print!("\r\n")
});
($fmt:expr) => ({
print!(concat!($fmt, "\r\n"))
});
($fmt:expr, $($args:tt)+) => ({
print!(concat!($fmt, "\r\n"), $($args)+)
});
}
// ///////////////////////////////////
// / LANGUAGE STRUCTURES / FUNCTIONS
// ///////////////////////////////////
#[no_mangle]
extern "C" fn eh_personality() {}
#[panic_handler]
fn panic(info: &core::panic::PanicInfo) -> ! {
print!("Aborting: ");
if let Some(p) = info.location() {
println!(
"line {}, file {}: {}",
p.line(),
p.file(),
info.message().unwrap()
);
}
else {
println!("no information available.");
}
abort();
}
#[no_mangle]
extern "C"
fn abort() -> ! {
loop {
unsafe {
asm!("wfi"::::"volatile");
}
}
}
// ///////////////////////////////////
// / ENTRY POINT
// ///////////////////////////////////
#[no_mangle]
extern "C"
fn kmain() {
// I don't need to add crate in front here because we're in the root
// module (lib.rs).
// However, we had to add crate:: for the print! macro since that metaprogrammed
// macro will expand into other, non root modules, where the crate:: will be
// necessary.
// Remember, the default base address is 0x1000_0000.
let mut my_uart = uart::UartDriver::new(0x1000_0000);
my_uart.init();
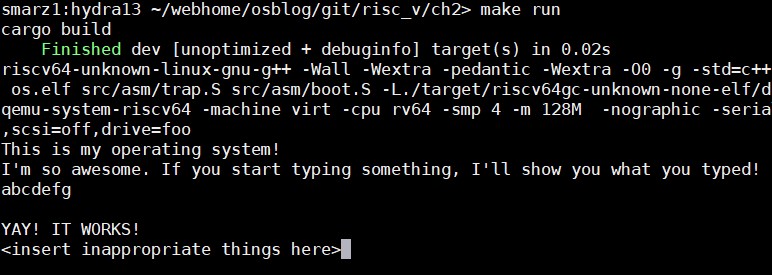
println!("This is my operating system!");
println!("I'm so awesome. If you start typing something, I'll show you what you typed!");
// Our goal is to repeat, or echo, what the user types to us. This is just for testing!
}
// ///////////////////////////////////
// / RUST MODULES
// ///////////////////////////////////
pub mod uart;
I went ahead and pre-gamed (go <insert your team's name here>) with the println!() expecting everything to work. There's always that moment in my life where
I hold my breath when I run make and just wait for the litany of errors to show me what a terrible programmer I am.
With this, the pub mod uart will look for a file called uart.rs in the same directory as our lib.rs. Later, we will create directories and use the mod.rs. If
you know what I'm talking about, we'll get there soon! If you don't, don't worry, we'll get there later. (Yes, I said two contradictory things).
Since this importation is the behavior of Rust AND we wrote uart.rs, we should be in good spirits.
SPEAK, My Child
Lets see if we can have our child (the OS) speak to us. Assuming we wrote write_str correctly and that we didn't forget to initialize the UART first, we should see some words. I forgot at first, but
I have the luxury of editing my post--who could tell, right?

So, run make run and let the child speak! If you couldn't get anything, please take a look at my Git Repo for chapter 2 at https://github.com/sgmarz/osblog.
LISTEN, My Child
Now that we know that our child can speak, let's see if our child can listen. Remember, write_str, which is part of the Write trait, calls our uart_put function to
put character by character (strictly speaking, u8 by u8). A character has been bastardized ever since UTF.
We will eventually move this code into a console handler with a buffer so we can grab entire strings and not just characters, but here goes nothing:
let mut my_uart = uart::UartDriver::new(0x1000_0000);
my_uart.init();

println!("This is my operating system!");
println!("I'm so awesome. If you start typing something, I'll show you what you typed!");

// Now see if we can read stuff:
// Usually we can use #[test] modules in Rust, but it would convolute the
// task at hand. So, we'll just add testing snippets.
loop {
	if let Some(c) = my_uart.get() {
		match c {
			8 => {
				// This is a backspace, so we essentially have
				// to write a space and backup again:
				print!("{}{}{}", 8 as char, ' ', 8 as char);
			},
			10 | 13 => {
				// Newline or carriage-return
				println!();
			},
			_ => {
				print!("{}", c as char);
			}
		}
	}
}
Rust has a loop, which unconditionally loops as fast as possible. We should add some brakes, but for now, let's just read characters as fast as we can get them. The new syntax
most non-Rust programmers are going to see first is the if let Some(c) stuff. Remember that my_uart.get() returns an Option, which is either Some or None.
Using the if let, we can extract the underlying value from the option AND see if the Option was Some all at once. In the case above, the if let will only execute its body if my_uart.get()
returns Some. Remember, we also wrapped the character that we popped from the UART into this Some() structure (enumeration to be exact). Therefore, the code inside of this block means that a new variable
called c contains the character that was wrapped in Some. Nifty, right?
The second language structure is the match statement. It resembles a switch statement, but without the confusing breaks. In this case, Rust will examine the contents of the
variable c. We then specify certain cases if c matches to them. In the code above, we have special code for when c matches 8 and 10 or 13. The | (pipe character) allows us to specify multiple cases for a single arm. Again,
just like with the macro matching in print and println, we use the fat arrow to extend the arm.
Case 8 is the numeric code for a backspace. However, backspace really means to "move the cursor to the left by 1 character". So, if we just printed that, the cursor would move, but the underlying text would still be there. So, our solution is to move the cursor, draw a space (which will move the cursor right one space), and then move the cursor left by that one space.
Case 10 is the '\n' (new line) character, where as case 13 is the '\r' (carriage return) character. Depending on your terminal and terminal emulation, you might get one or the other or both. All we do
is call println!(), which will cause Rust to match the first arm (the one without any expression or token tree). Reviewing the code there, we see that this will just print a newline.
// This is println!s arm if no parameters are specified.
() => ({
	print!("\r\n")
});
Finally, the underscore is used to capture everything else--sort of like a "none-of-the-above" option. It is much like the default case on a switch statement. Anything we couldn't match with the arms above will match here. Rust forces
us to have a case for every possibility, therefore, we either specify 256 possibilities (0 - 255), or a few possibilities and then a catch-all. I chose the latter.
SIDE NOTE: Rust doesn't require us to add braces for each match arm if there is only one line of code. However, since we will be building on most of this code, I put braces for "future expansion".
TEST!
Let's see if this works.
Final Consol-ey Thing
Many people don't remember ANSI escape sequences because we have GUIs now. However, these will be passed to your UART system whenever you press extended keys, such as the arrow keys. Right now, the arrow keys just move the cursor around on the screen since we print out the exact byte sequence.
ANSI escape sequences are multiple bytes and start with the byte 0x1b (decimal 27). The next byte is 0x5b (decimal 91), which is the left bracket character '['. Then the rest are parameters to the sequence. We're going to capture sequences for the up, down, left, and right arrows. So, add the following to your match arm:
0x1b => {
	// Those familiar with ANSI escape sequences
	// knows that this is one of them. The next
	// thing we should get is the left bracket [
	// These are multi-byte sequences, so we can take
	// a chance and get from UART ourselves.
	// Later, we'll button this up.
	if Some(next_byte) = my_uart.get() {
		if next_byte == 91 {
			// This is a right bracket! We're on our way!
			if let Some(b) = my_uart.get() {
				match b as char {
					'A' => {
						println!("That's the up arrow!");
					},
					'B' => {
						println!("That's the down arrow!");
					},
					'C' => {
						println!("That's the right arrow!");
					},
					'D' => {
						println!("That's the left arrow!");
					},
					_ => {
						println!("That's something else.....");
					}
				}
			}
		}
	}
},
Now, run your OS again, but this time, try the arrows! This will be helpful when we write our shell.
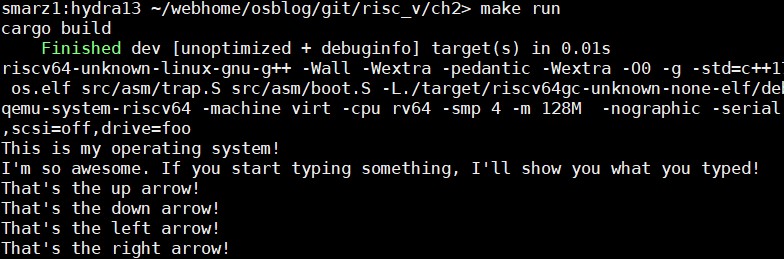
If you're too quick with the arrows, sometimes you will see the A, B, C, or D show up. This is because you will match the escape sequence, but miss byte 91. Therefore, your loop looks like its just a normal A, B, C, or D or even the left bracket '['.
![]()
WOW, THIS CODE IS DIRTY
Yep. Have you ever seen construction on a house? You're looking at the scaffolding as we pave our way through the operating system. The simple, but dirty, approach to communications allows us to tighten up the code we're about to build for the next part of our operating system. The advantage is we get to communicate with little code. As we put more Rust language constructs around the UART driver, each operation may not seem as apparent.
For now, we just want to communicate. We start with baby talk, and then we can start integrating the UART into a console module that will support more terminal-like features. Remember, get it to work, play, rejoice, beer (it's a verb, right?), and then we can start cleaning up the code. I expect that many more chapters will be like this. We will explore memory allocators, which have been widely researched, and we'll pick one, see if it works for us, and then pick another if it doesn't. I see this more as a journey than "here's the end product, enjoy!" There's already an end product--called Linux for RISC-V if that's your only goal.
Communication Is Key
Using a debugger is a big challenge, especially if you're not familiar with how to use one or the particular one you're using. Instead, I teach my students who have never programmed before to print out values at certain increments to see if they get what they think they should get. You now can listen to your operating system and talk to it. You can start experimenting yourself to see what cool things you can make it do. Also, experiment with Rust. I'm by no means an expert, as many Rust developers are attesting to on my GitHub--although I welcome the education (I really do!). So, perhaps you can find neater and better ways than I did using Rust. If so, let us know!